ServiceNow SaaS ERP Application
In this post, we’ll take a look at building a simple Test Automation Framework to test some of the core ServiceNow application modules using Appium, Ruby & Cucumber. ServiceNow is an extremely popular Enterprise ERP SaaS platform. Per the ServiceNow website:
ServiceNow is an extremely popular enterprise application providing a service model that defines, structures and automates the flow of work, removing email and spreadsheets from the process to streamline the delivery of services. With roots in IT, the ServiceNow service management solutions address all the service domains of modern enterprises including human resources, facilities, and finance.
We’ll first delve into the setup and framework behind the functional tests. After, once we, are ready to execute, we will run the test cases through Awetest. Then, we will take a look at our reports to see our results
Functional Setup
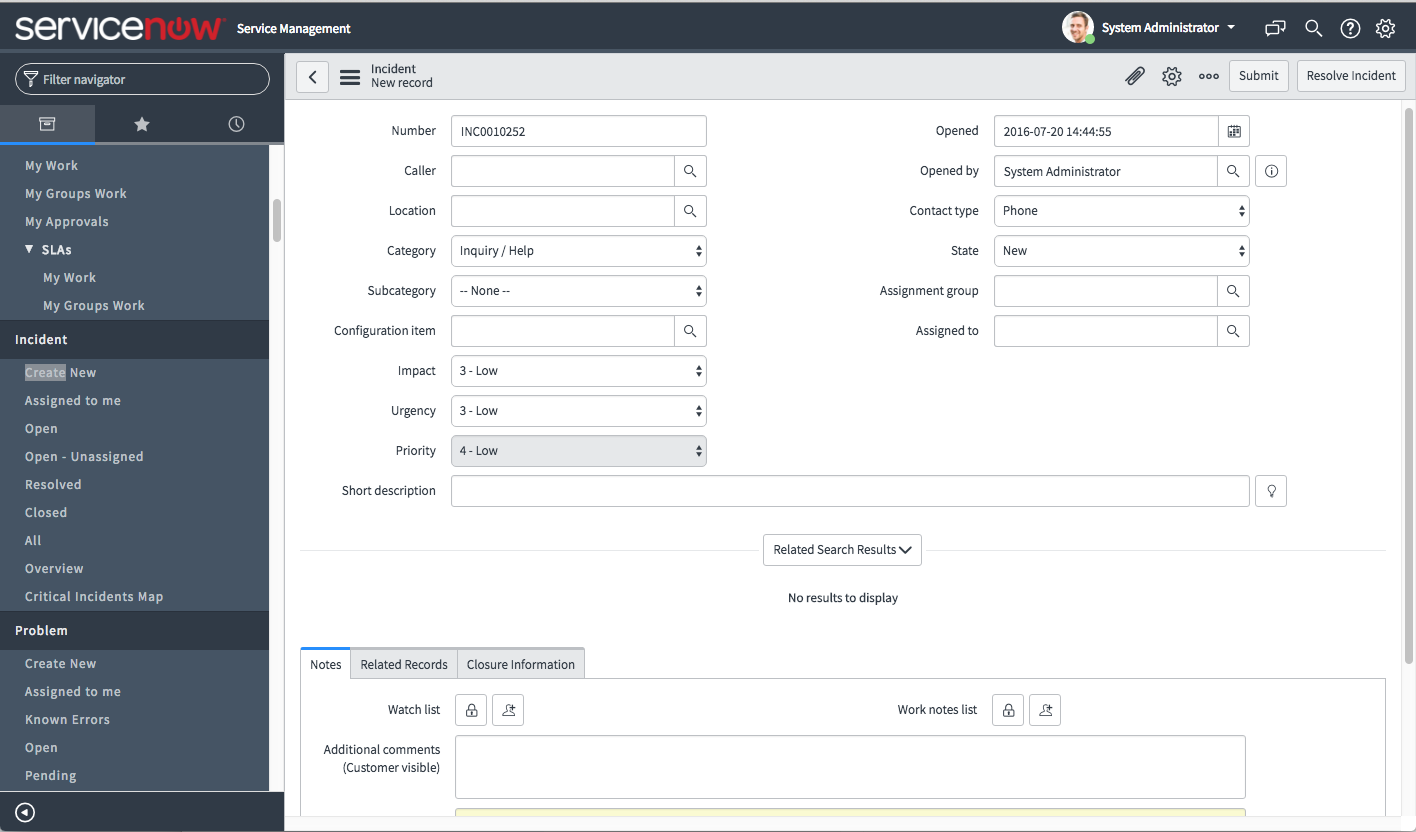
Let’s take a look at one of our functional test cases. This test is built to log in to ServiceNow, create a new incident and validate its creation. Let’s open up Awetest and navigate to our web module where we have our uploaded feature files.
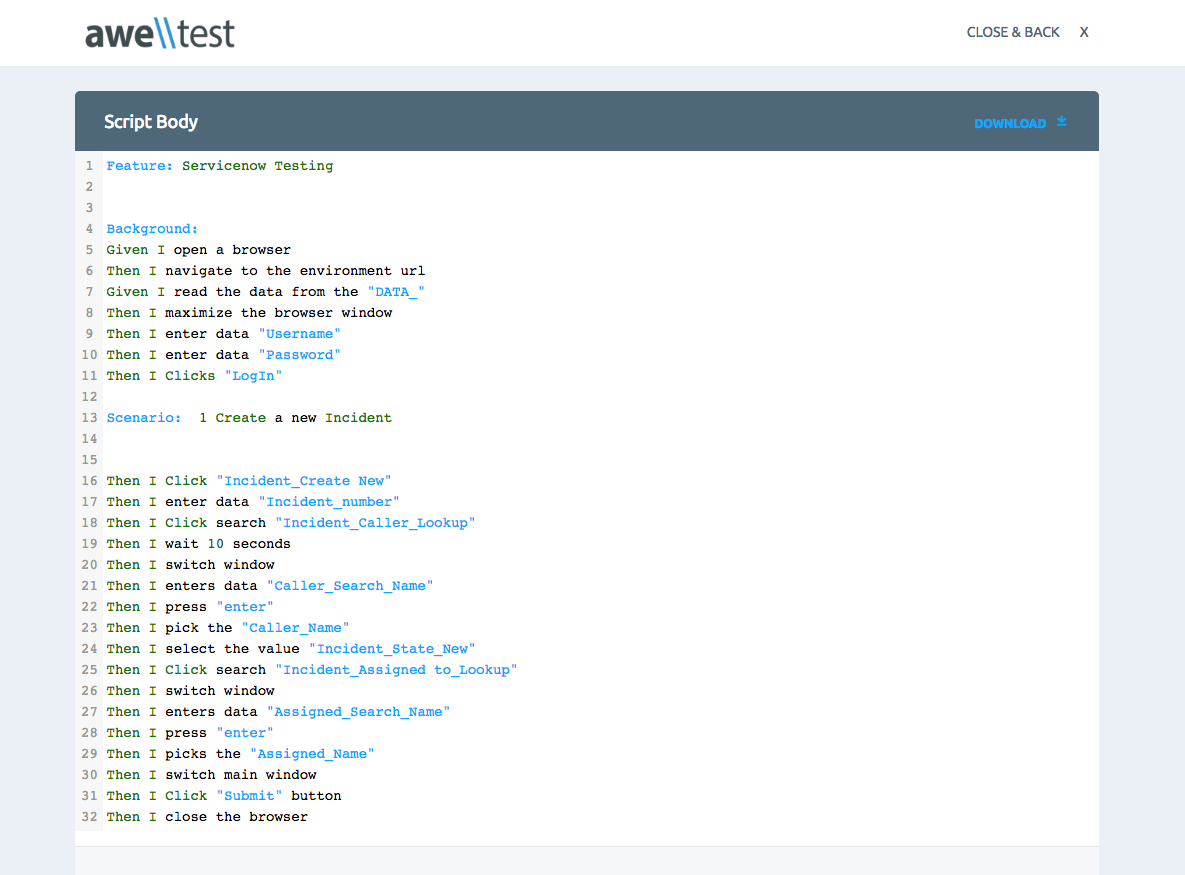
Cucumber Script to Test ServiceNow Create Incident Workflow
In this script, the commands are referring to actions executed against the ServiceNow browser application. For example, Line 24 “Then I select the value incident_state_new”, refers to selecting the specified value from a dropdown during the “Create a new incident” flow. Our object name in this case is “incident_state_new”. The object name references our object repository which is created in an excel document here.
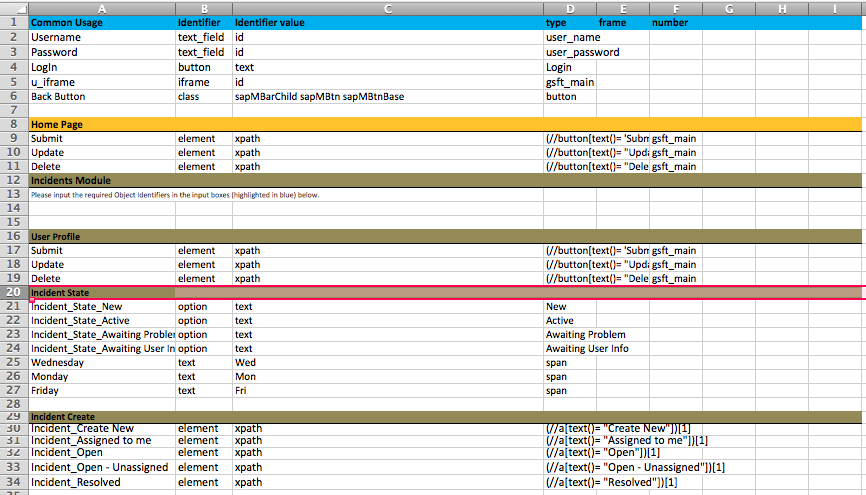
Framework captures the Object Details of the elements across the ServiceNow application
This contains identifiers for our various html elements which we can assign an object name to, creating a Keyword driven framework powering our feature files. The framework is broken down into the various pages and modules we are testing in our target application. It also contains a separate sheet for inputting data that will be utilized in the test scripts.
A standard framework that we build for clients utilizes a combination of Appium, Ruby, Cucumber, and a variety of other open source tools to power our keyword and driven frameworks. These frameworks are highly reusable, as they allow us to quickly troubleshoot and change our target elements without going searching through documents and adjusting multiple lines of code.
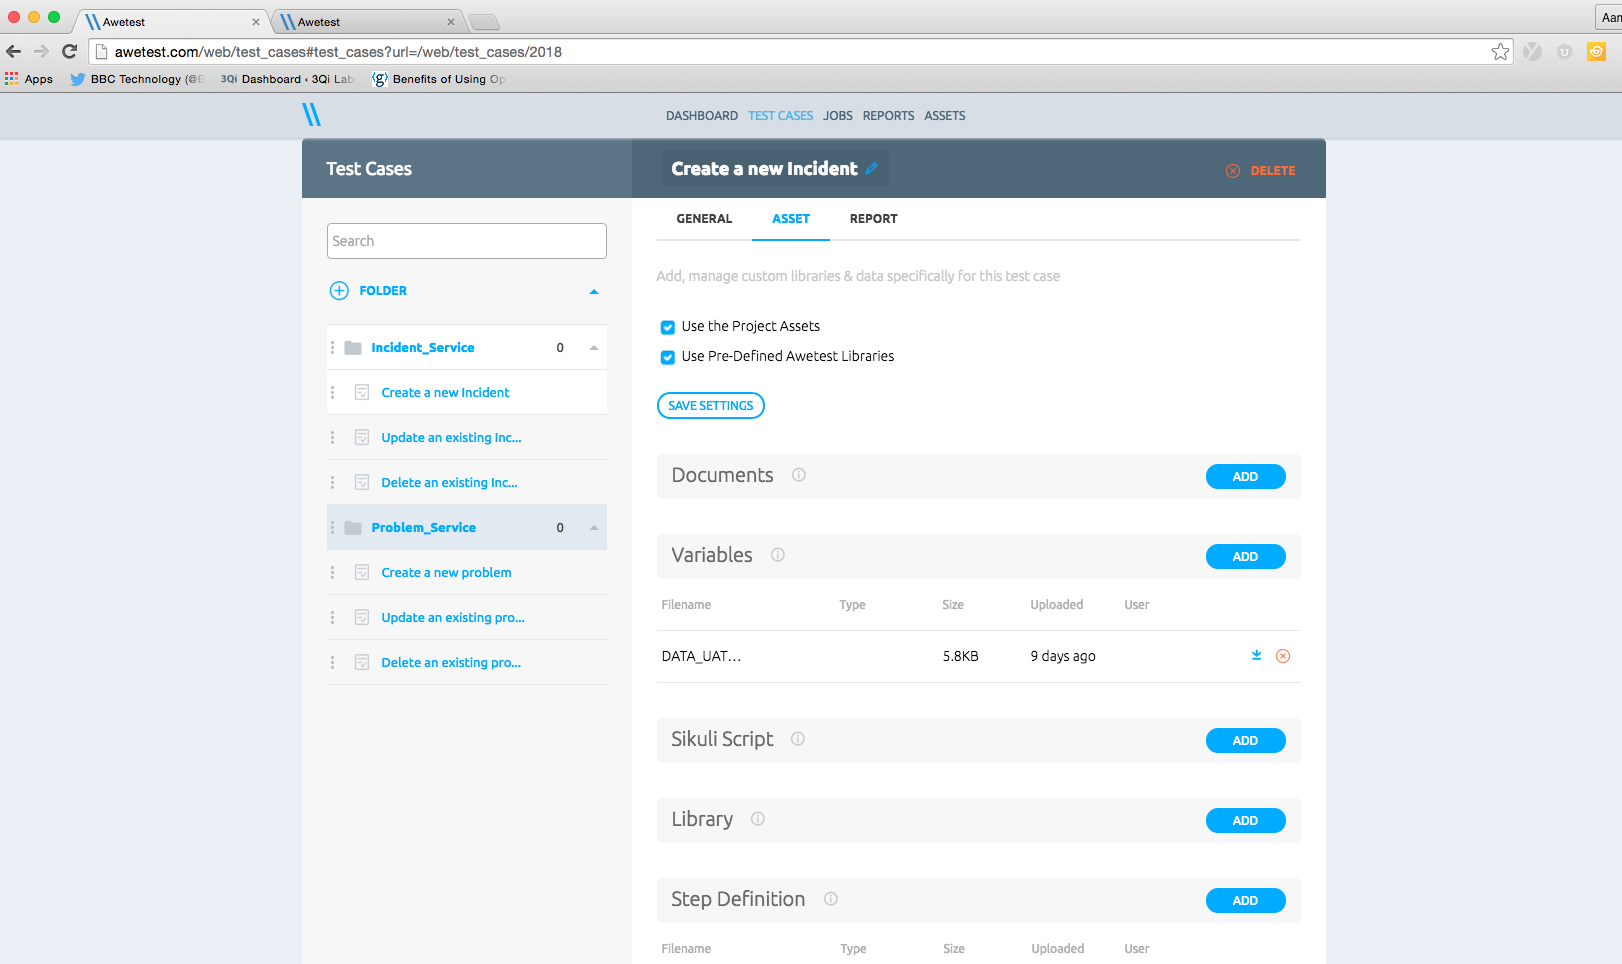
The assets area of a test script in Awetest allows one to upload test case specific frameworks and step definitions.
We can see our assets are currently uploaded to our specific script. We also have the option of uploading assets for the whole project, so each test case is drawing from a shared framework and step definitions. Now, lets go back into Awetest and navigate to the mWeb module. We have our mWeb test scripts and assets, laid out in the same manner as our Web module. Now that we’re all set up, we can start our execution
Functional Execution
We can now navigate to the jobs page, where we will be adding a new job and specifying the test cases we want to run. Here we will select our “Create a new Incident” test case. We have multiple development environment urls to select from, and we will run through our UAT URL. We will run this on a Chrome Browser, and we will be running the job immediately, as we have no need to schedule it.
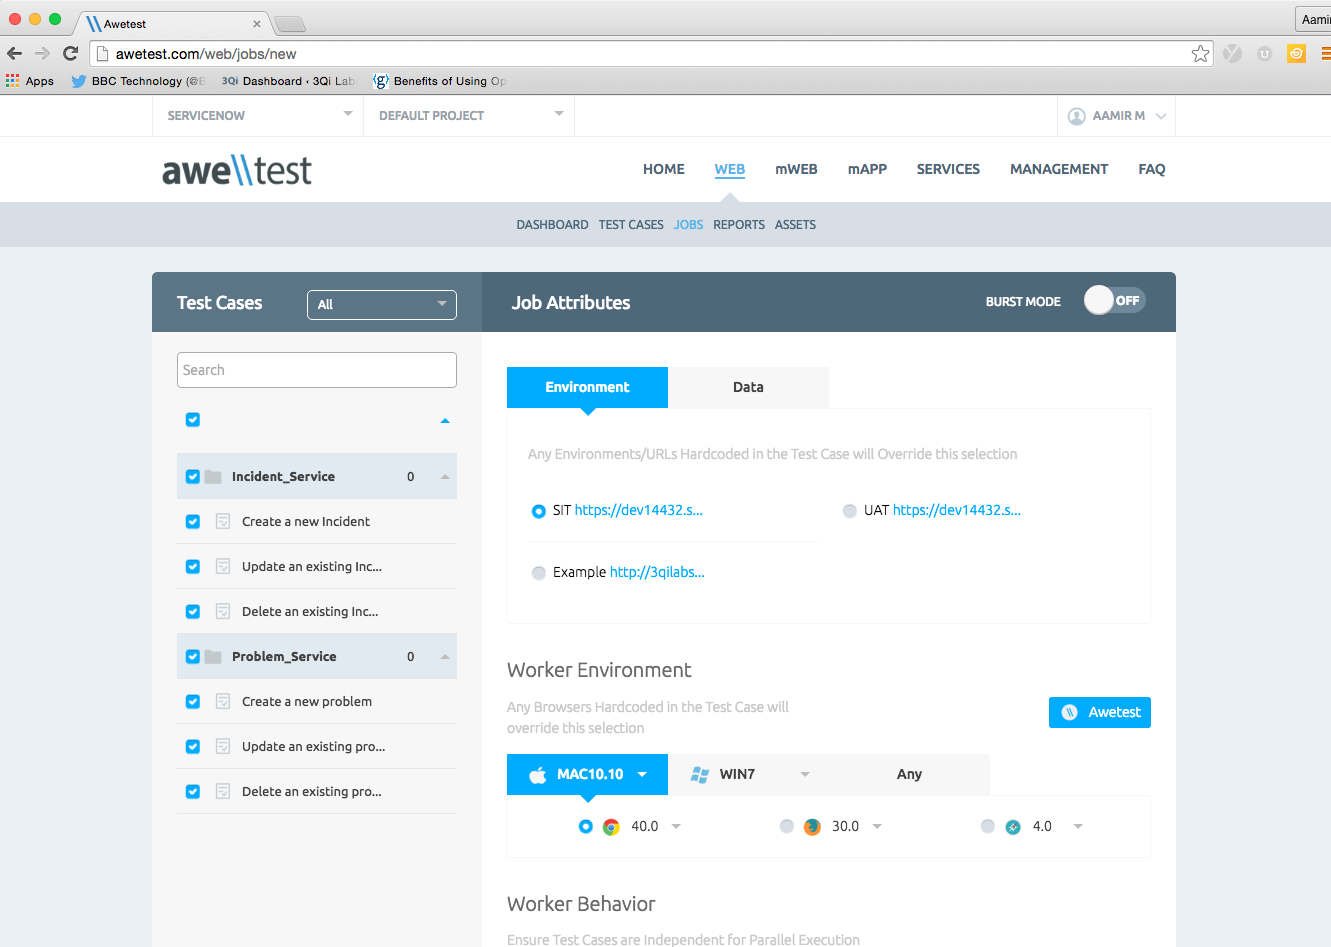
On the Awetest Jobs page, we can select our test cases, environment URL, and Browser.
There are multiple options here which we can select for our test run. Here, we will choose to Capture Video, Screenshots on Errors, and add a comment for our test run. We now hit run, and let the job execute. We will do the same for mWeb.
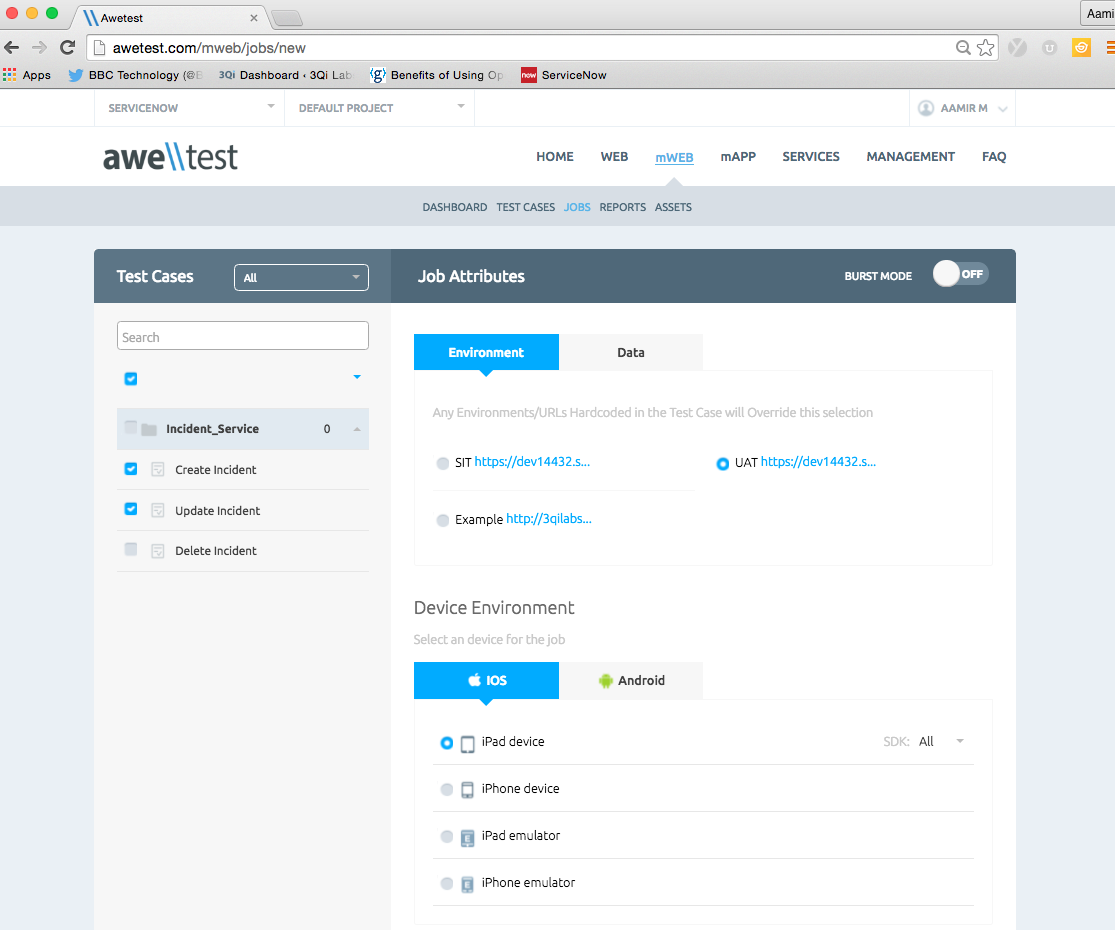
The Awetest jobs page for Mobile test execution supports a multitude of devices.
We can select our device, fill in our details, and hit run. here are numerous other features related to parallel processing, Integration with Cloud Providers like AWS & Microsoft Azure, Device Management, etc. – you can find additional videos on these on our website or YouTube Channel.
Functional Report
Once our job has ran, we can take a look at the reports section. We will click through to the Detailed tab and find our test run. At the top we have details on the company, project, and user we ran our test cases on, along with time, total validations, total errors, and the browser/OS we ran on.
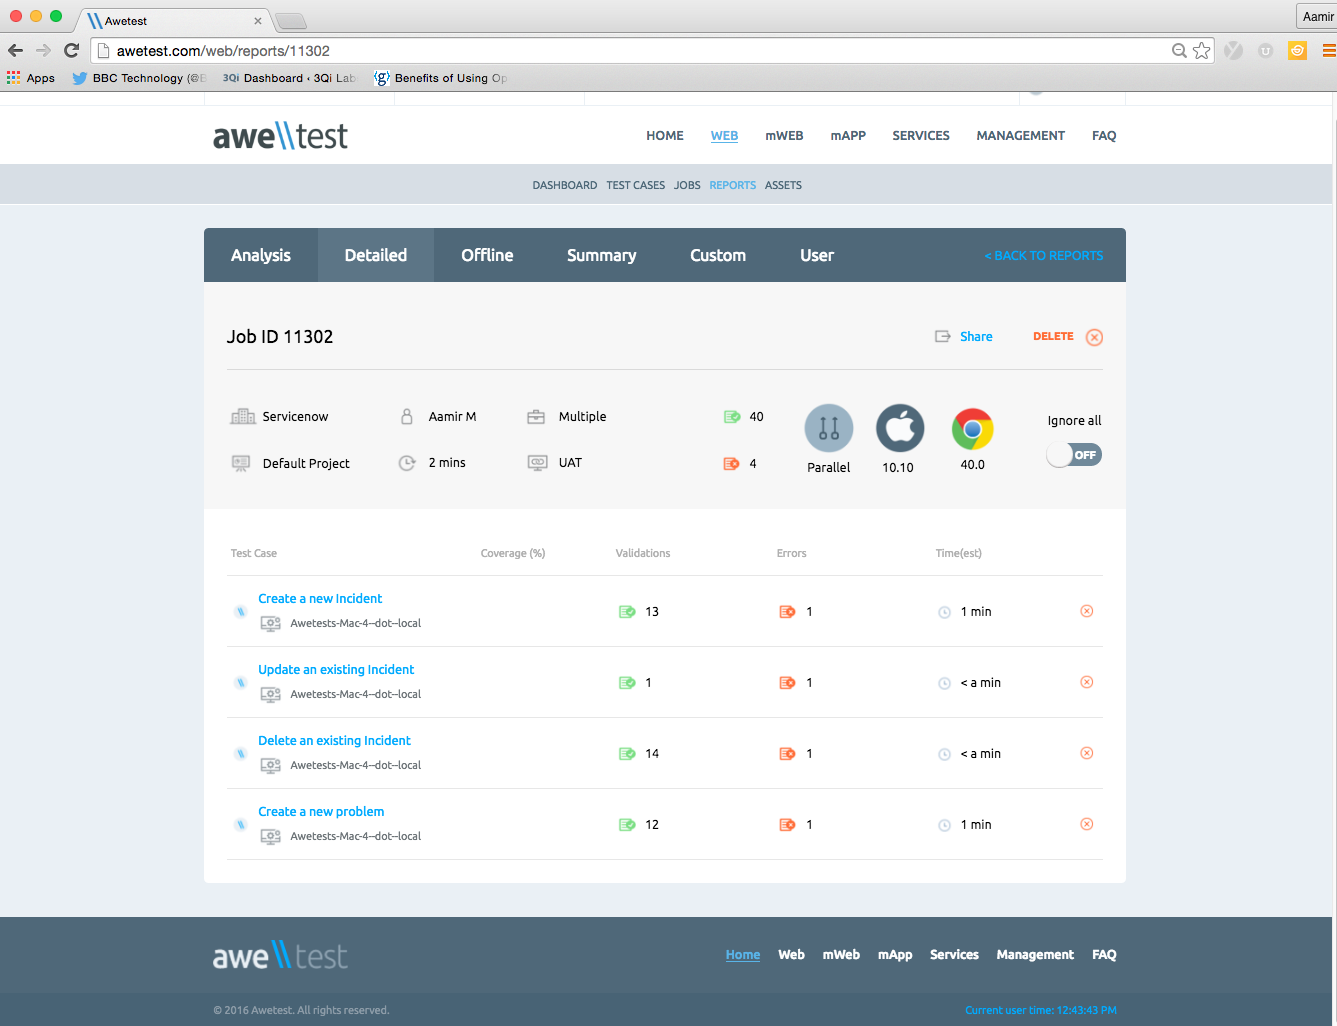
Here are the results of the web test run.
Below we have an overview of the test cases we ran, with individual breakdowns of validations, errors, and time ran. We will click on our “Create a new incident” test case for further details. We can see each step, the run time, and the option to view the line of the step in our test script.
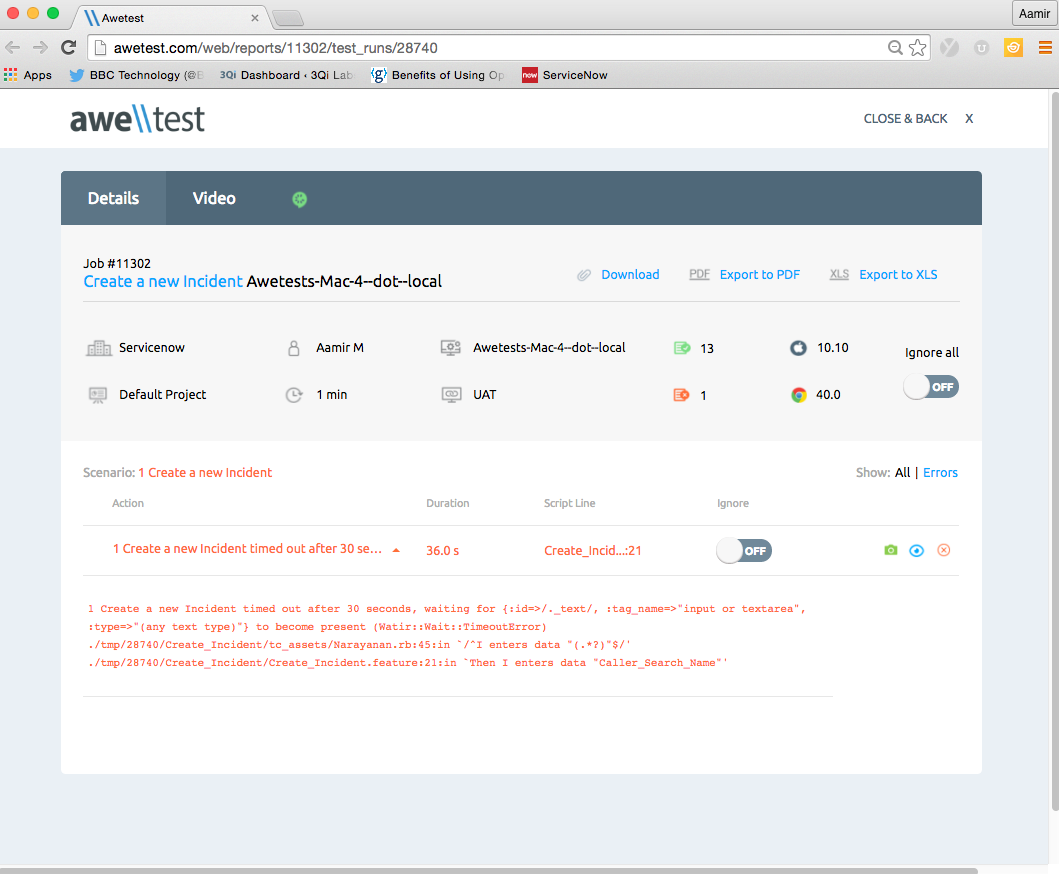
The detailed breakdown of the test run shows why the error happened.
If our script has an error, we are able to click the error for more details, including a screenshot, and the cause of the error under the step action. If we navigate to our mWeb report, we can see the same breakdown. Both reports include a video that is captured directly from your device/computer and uploaded with the report.
Conclusion
Now you’ve seen how simple it is to set up, execute, and view the results of functional test automation through Awetest. By utilizing Awetest and our ServiceNow specific Automation Framework, we are able to have a single document which contains all of our objects and interactions that our test cases will execute. The transparency and reusability offered by a data driven framework makes it a perfect fit for building your automation and expanding across multiple ServiceNow modules.
We’ve attached a video walkthrough of the entire process below.